Tuesday, November 29, 2011
Quality - Open Source for the Win (Part Deux)

A short while ago Neil posted here about the way RepRap 3D print quality is starting to knock spots off the proprietary competition.
Well. This blog is not the place for RepRap spinoff company Ra Ra, so I have left it until our sales campaign here is just about over before making this post. (And no - I couldn't manage to resist abusing my position and including the link.)
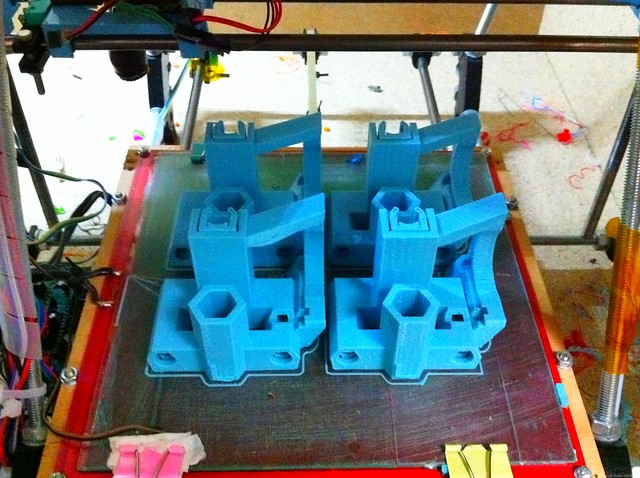
Jean-Marc just printed Misguided's Screw Cup from Thingiverse (above) on one of our RepRapPro Huxleys in ABS. We used a non-standard 0.3mm nozzle (standard is 0.5mm) and a layer height of 0.1mm. It took a while under those conditions, of course - 5 hours.
But check out this surface finish under the microscope:

The line is a 60-micron human hair (selflessly donated by Christine Bowyer under only mild protest; as those aware of my appearance will know, I am incapable of providing such a sample myself).
We think that the quality we're getting is rather good...
Labels: surface quality
Monday, November 28, 2011
Around the RepRap Community 11/28/2011

Hall-O effect Endstops
Hall-0 effect sensors have an advantage over both mechanical endstops and optos because it senses distance instead of waiting for contact, so it should never wear out like a mechanical endstop, and not be affected by lighting changes in the room like an opto. Of course this is the open source board upload by Jos to the RepRap Wiki. Being open hardware you can get the eagle files off the wiki or buy them from Ruben-Ikmaak for 9 euro with cables and magnets included at his website.

(Credit Red of Hackerspace Charlotte (NC_USA))
MendelMax
MendelMax is a new Open Source RepRap
MendelMax costs a bit more, weighs a good bit more, but the frame is much physically tougher, and looks 500 times sexier. I have yet to see any parts for MendelMax go on Ebay/Emakershop, but Lulzbot is selling the parts. They also took a pretty cool pic showing how strong the frame is.

credit Lulzbot/Alphobjects
One other must share image, what happens when you mix Makerslide, & MendelMax

Credit Nick Wilson
WINNING!

Credit Neil Underwood at Fablocker Hackerspace in Winston-Salem NC
Printrbot
Printrbot is a a smaller scale Reprap design, very similar in size to the Emaker Huxley, but the standard "Mendel" design has been dropped in favor of a very simplified base frame and a floating y stage (The Y axis is supported only in the middle). The core team of Printrbot where nice enough to let me have the files pre-release (I think release will be in late December) to help out in the Openscad conversion.
As you can see, I did not get the chance to finish the bot over the weekend, so I hate to review it. Plan is to have review of the bot after I get a 1st print (should be later this week (I hope)). But I can tell you they are for real, and the parts will go together into a functional machine. How well it prints in the real world, and whether the Axis's are as robust as Prusa, I will fill you in on that later.

For the last 3 weeks now my go to Gcode generation program has been Slic3r (Found very few things it does not slice, but if it does not I just use Sfact). This slicing engine is a complete ground up rethink of Gcode generation, and honestly I have never had anything that is this easy to set up. Only things you need to give it are nozzle & filament diameter, packing density (if your E step/mm is dead on this should be 1), your requested extrusion width/height, and your set up. Generating Gcode is about 10 times faster on big things and 2-3 times faster on small things. It's definitely worth checking out.
Sunday, November 27, 2011
Reprap Prusa Iteration 2 Build Event in Cologne Germany in December
(Posted at request of Kliment Yanev, if you are having a RepRap Build Party, RepRap.org would love to support you by announcing your event on the main blog.)
A reprap build workshop is going to take place in Cologne, Germany on the first weekend of December (3-4.12). Ten groups will have the opportunity to build their very own 3d printer, get it working, and take it home with them.
Under the guidance of Josef Prusa, Kliment Yanev and Ruben Lubbes, we'll build ten printers of the latest Prusa Iteration 2 variety. More info on Prusa iteration 2 at Prusa Iteration 2
After building the printers, we'll look at control and design software, basic troubleshooting, and where to get designs, ideas, and help. At the end of the workshop, every participant or group will go home with a working printer.
Here is a video of an earlier workshop organized by the same team:
Workshop data:
Time: 3rd and 4th of December 2011, from 10.00h to 19.00h on both days. Impatient builders may continue past 19h on Saturday if they wish to, but that should not be necessary.
Location: Coworking Space Gasmotorenfabrik, 3rd floor, Deutz-Mülheimer Str. 129, 51063 Cologne, Germany
Price: 850€ per printer. The number of participants per printer is not limited (though 2-3 is ideal).
Signup by email, kliment.yanev @ gmail.com
Included in the course price are all the parts as well as some plastic print material. The electronics, hotend, and cable terminations (the boring bits that eat a lot of time) will be done for you in advance.
Required tools:
- -Set of hexagonal keys (allen keys) including small sizes
- -Screwdriver set
- -Wrenches in sizes 13 (ideally two pieces), 7 and 5.5
- -Electronics pliers set (at least needle nose and side cutters)
- -Tweezers
- -8mm round file
Note that we have all these tools available onsite, but not enough for everyone. Please bring your own set of tools if at all possible.
Photos of past build events are available at http://ikmaak.nl
Wednesday, November 16, 2011
Playing Fast & Loose

Above is an Orca-style RepRap frame using 10.8mm round extruded aluminium tube simply whacked into printed sockets with a large mallet. The result is slightly under tension on the back bracing which holds the whole thing very securely together with no fasteners.
This is much lighter and simpler than traditional prototyping-style construction with adjustable threaded rods all over. It has the benefit that the smooth rods can be used as axis guides as well as support structure. The Orca-style dihedral distributes load and prevents swaying from side to side.
It's crowned with a one-piece extruder that includes all the guides, clamps and sliders in a single printed piece. It could still be easier to assemble though.
This is really an initial space model - I've not put much work into the brackets and Z lift mechanism yet. Didn't want to have to rework everything if it wasn't stable! I'll cause controversy with the Z axis next :)
Vik :v)
Friday, November 11, 2011
Prusa Iteration 2
When I have RepRap presentation I always say that I update my printer almost every week. If you watch my GitHub Repository, you must be puzzled now. It's a long time since my last commit there. But when you look closer you would find out that the printer lived in Felt branch last few months. It evolved into something much slicker, smoother and sexier. While keeping it's workhorse spirit.
It was already build on many workshops and it speeds up the build by many hours! Forget glueing the bushings, that was soo 2010.
Iteration 2 is the younger, cooler brother of Prusa. It has 111111 changes and it's 63 times better :-)
Print NOW!
I quickly pick some important changes of Iteration 2
1) Push fit
Where it is possible parts are just pushed in without any fastener needed :-)
2) Bushings
You have possibility to use Igus professional bushings, brass tube, felt, pla printed bushing or even printer lm8uu alternatives.
All bushings are simply snap in mounted, you can easily maintain your printer!
When you need your printer quick you can always find one of those at home :-)

3) No SAE version.
Are you sad?? You shouldn't be, parts will work with both metric and imperial fasteners.
Get M3 for small fasteners (you need them for NEMA 17s anyway) or #4 imperial ones if you really need to.
5/16 rods will work in place of M8 without any change!
4) LM8UU
You asked for it, so you got it! :-)
5) Less tools needed
All M3 nuts have nut traps. I've done workshop where everyone had only one Philips screw driver and two wrenches fro M8 nuts!
No jigs or measurement during print! Rods are exactly length you need from end to end.
6) One plate bed
That's kinda hack. PCB heatbed actually works as second plate.
But it needs no leveling at all and frees lots of space under Y axis for electronics or PSU to make tidy, cute printer!

7) Better belts
I use T2.5 belts instead of T5 for a long time, and it affects the quality more significantly then any lm8uu would ever do. Now it's official suggestion, get GT2 ot T2.5 belts and machined pulleys! Be professional!

8) Better documentation (future)
I get best team to help me manufacture the new documentation!
Kliment and Garry Hodgson (you many know him form Prusa Mendel Visual instructions).
Expect to see it pretty soon! And fully done in ThingDOC!
Watch out my GitHub, Flickr and Twitter to get latest updates!
![]()