Wednesday, June 21, 2006
First try at filament...
I got up early and made the little poplar piston after a bit of sawing, rasping and then fine shaping with my Dremel hand tool. I had a piece of scrap poplar left over from a particularly clumsy attempt to make a Frankenmotor mount that worked as a seat for the extruder barrel.
Here goes...
Here's a view of the very complex 2.77mm extrusion orifice....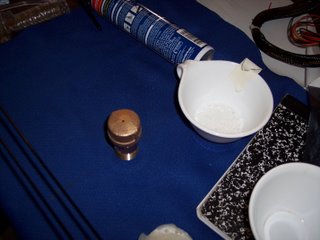
...and the super sophisticated method for avoiding dribble during the heating cycle.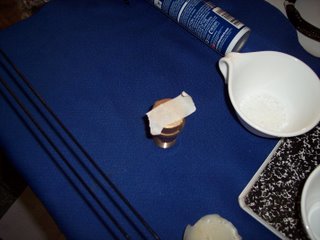
...and how I'm going to keep it upright in the toaster oven.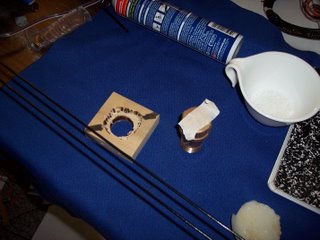
Now we prep to charge the extruder... ...very tricky...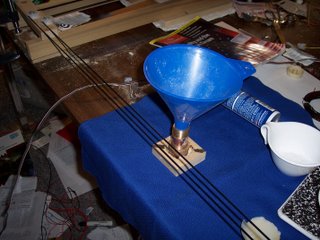
A tablespoon was used for charging the extruder barrel...
Here you can see the famous toaster oven with the extruder inside and the IR thermometer laying on it's door.
And away we go...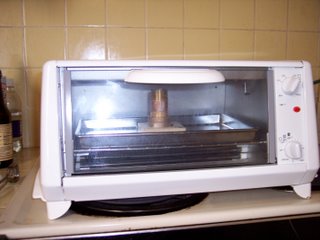
It took only a few moments for the caprolactone to hit 60 degrees and go virtually transparent.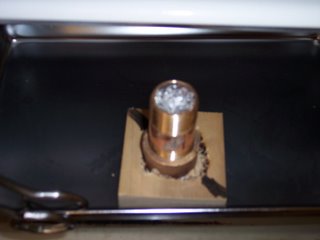
An hour later I locked the extruder barrel in my vise and insertted the poplar piston.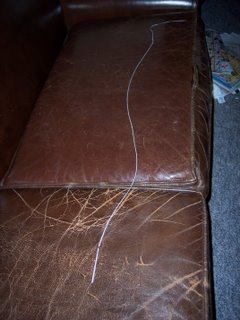
As I expected I had to apply a considerable amount of pressure to get an extrusion going. I got about a metre of good filament out before the extruder barrel extruded to a point where there was more pressure required than I could apply to the piston.
I let the filament hang free and it stretched a bit as a result. If I corrected for the stretch I suspect that I got about 750 mm of 3 mm filament. The quality and shape was excellent. It was the same colour as the granules, had a round cross-section and coiled quite easily.
One bubble about 50 mm into the extrusion exercise was serious enough to cause a structural break in the filament. Other bubbles were so small that they popped and the filament healed. This same phenomena was observed in experiments with the auger extruder done some months ago.
I did a second extrusion and quenched it in water. I got another metre yield with a lot less gravity stretching. Diameter varied between 2.75 and 3.05 mm.
My son was watching the extrusion and noticed something of good interest. He noted that bubbles were happening when I let off pressure on the piston for a moment and the extruder drew air into the cylinder through the extruder orifice.
Here goes...
Here's a view of the very complex 2.77mm extrusion orifice....

...and the super sophisticated method for avoiding dribble during the heating cycle.

...and how I'm going to keep it upright in the toaster oven.

Now we prep to charge the extruder... ...very tricky...

A tablespoon was used for charging the extruder barrel...

Here you can see the famous toaster oven with the extruder inside and the IR thermometer laying on it's door.

And away we go...

It took only a few moments for the caprolactone to hit 60 degrees and go virtually transparent.

An hour later I locked the extruder barrel in my vise and insertted the poplar piston.

As I expected I had to apply a considerable amount of pressure to get an extrusion going. I got about a metre of good filament out before the extruder barrel extruded to a point where there was more pressure required than I could apply to the piston.
I let the filament hang free and it stretched a bit as a result. If I corrected for the stretch I suspect that I got about 750 mm of 3 mm filament. The quality and shape was excellent. It was the same colour as the granules, had a round cross-section and coiled quite easily.
One bubble about 50 mm into the extrusion exercise was serious enough to cause a structural break in the filament. Other bubbles were so small that they popped and the filament healed. This same phenomena was observed in experiments with the auger extruder done some months ago.

I did a second extrusion and quenched it in water. I got another metre yield with a lot less gravity stretching. Diameter varied between 2.75 and 3.05 mm.
My son was watching the extrusion and noticed something of good interest. He noted that bubbles were happening when I let off pressure on the piston for a moment and the extruder drew air into the cylinder through the extruder orifice.
Comments:
<< Home
I attempted to repeat the experiment using a similar configuration stood up in a saucepan of boiling water. The plunger was an AA battery padded out with a wrapping of masking tape.
Extrusion was hard, and poor. We only got a couple of inches of filament out before it clagged solid.
Vik :v)
Extrusion was hard, and poor. We only got a couple of inches of filament out before it clagged solid.
Vik :v)
I'm really sorry, Vik. Looking back at the blog entry I se that I failed to report the oven operating temperature. I was running at 130+ degrees.
That let me get about a meter of good extrusion before it got too cold to continue. I wasn't too worried about the cooling off part in that I was trying to get a handle on exactly how much force I was having to apply, which was quite a lot.
That left me to suspect that I need to use a lever to multiply force and/or a gear motor driving the piston or pushing the lever to get a linear extrusion producing thrust.
Because I'd like to use larger diameter extrusion barrels I've been thinking of a couple of ways of reducing the pressure needed to extrude. First off, extruding into gravity lets the filament stretch so that you need a larger extrusion orifice that the ultimate filament diameter. I discovered that a 2.77 mm orifice produced about a 1.5 mm filament when I allowed it to do a free stretch. That would mean that I could make an orifice of over 4.5 mm to get 3 mm. That would greatly reduce the pressure required to extrude.
I'm also thinking that if I can get the ID of the extruder barrel up to maybe 1.5-3 inches I'll use a sleeve heater rather than an oven to heat the extruder barrel.
Vic, maybe repeating your experiment, but without the water in the saucepan? You would get higher temps, a block of metal in or under the saucepan could act as a thermal buffer. And I thought CAPA was supposed to melt at 60˚C...?
Plaasjaapie, what if you used a longer brass pipe, like 6 or 8 inches? There would be more volumne but no increase in extrusion pressure.
Plaasjaapie, what if you used a longer brass pipe, like 6 or 8 inches? There would be more volumne but no increase in extrusion pressure.
I'm thinking of making some kind of thermal sleeve for the brass tube and slinging the whole lot in a domestic oven to reach maybe 150C. This might allow us to get more out of it at a time.
Vik :v)
Vik :v)
LOL! Is this a pretext for you to justify buying a drill press? :-D
I don't think a drill press would be very useful.
Here's how I did it. I took the capped pipe segment out of the oven, locked it into my vise, inserted the piston and put my weight into pressing a steel rod into the piston.
That got me a bit over a meter of filament over about a minute and a half.
The trick was that the brass pipe very firmly locked into the vise. There was considerable force involved that had to be dealt with.
In order to get a piston big enough to make a useful amount of filament we need more length and diameter, viz, volume in the system. As we increase that diameter the amount of force we have to apply increases proportionally to the square of the diameter. :-(
Plaas, how about a longer tube of the same diameter?
Maybe we should tempt Vic to buy a drillpress. If he can make a lathe out of a bench vise, imagine what he could make out of a drillpress...
I've got an old cheap Sears floor model that weighs more than I do, and I've squeezed a few things into place with it. It could also be used to sqeeze a short lever acting on the piston, but I'm not sure that would get you much more than just using a long lever.
How about drilling the hole in the brass cap on the bottom side -edge- instead of the middle of the underside? That way, it could be placed in a vice, and it could extrude the filament laterally.
Also, I've made a simple hydrolic shop press with a few feet of square steel "tubing" and a common 2 ton piston jack. That always manages to convince just about anything to take its proper place!
There's also the flypress approach; with a hefty enough screw, one can drive a die through several inches of hot steel wtih just muscle power. A smaller version could certainly handle this.
Oh, about my comment on the lateral hole, and the vice. I should have specified that the vise would be used to compress the plunger into the cylinder. In other words, as the vise is tightened, extrusion happens. Or so I would hope.
Jonored, neat that you tried extruding HDPE rod. Been mulling over doing the same, but the melt temp is so much higher than CAPA, at above 130˚C. I think it might make everything more complex than the ongoing RepRap focus on CAPA.
Where is everyone getting smaller amounts of CAPA anyway?
Jonored, neat that you tried extruding HDPE rod. Been mulling over doing the same, but the melt temp is so much higher than CAPA, at above 130˚C. I think it might make everything more complex than the ongoing RepRap focus on CAPA.
Where is everyone getting smaller amounts of CAPA anyway?
I've successfully extruded both HDPE and polypropylene using a 1/4 inch diameter piston extruder. You just have to crank the temperature up another 30-40 degrees Celsius.
Plaas, thanks for the encouragement vis the HDPE, I'm just wondering about viscosity!
Vic, Maybe you -should- consider buying a drill press...
I stuck my digital bathroom scale under the chuck and with only the most modest effort, I got a reading of 130kg. I was rather surprised. I had no idea it leveraged that much. I tried again with a -bit- more effort and got an error reading off the scale. It maxes out at 150kg!
Double checked everything, no apparent false readings, I still weight a scrawny 57kg. I'm now guessing I must have exerted about 250kg in the past when trying to get a tough job done, but I had braced the work table with an upright lenght of wood.
As an aside, I really do have to point out that drill presses are incredibly usefull, they are after all considered the grandfather of all machine tools. It has paid for itself a long long time ago.
***Where is everyone getting smaller amounts of CAPA anyway?***
Solvay has been very nice about giving us samples so far. :-)
Solvay has been very nice about giving us samples so far. :-)
Yes, I do need an excuse for a sturdy drill press :)
Small amounts of CAPA can be purchased as "Friendly Plastic" in the US from craft stores.
Vik :v)
Post a Comment
Small amounts of CAPA can be purchased as "Friendly Plastic" in the US from craft stores.
Vik :v)
<< Home
